Saturday, 21 August 2021
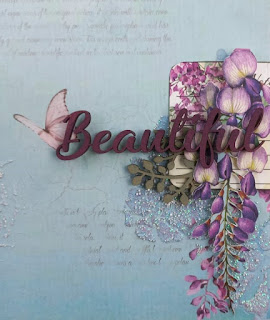
Beautiful - iCraft Australia
Wednesday, 21 July 2021
Craft on The Run - Mintay Childhood - Using Photo Mat pages
To help with some ideas, I have created a layout using the photo mat page from the Mintay Childhood range which uses all of the pieces in the photo mat paper in the layout and features 6 - 3x4 photos.
This layout can be used for any of the photo mat pages from the Mintay range.
I have used 3 pieces of the Mintay Childhood range and 1 piece of card stock (red). You can use any colour base card stock that compliments the paper range.
Next, take your photo mat page and select 6 of the rectangles that you would like to use for your fussy cutting. I selected the ones with the backpack and larger pictures to fussy cut. The other 6 will become your photo mats.
Fussy cut the 6 photo mats that you will use for your lay out.
Add the remaining fussy cut pieces from the page. Again, you may want to have many of the pieces 'peeking' out from under the larger fussy cut pieces. It is also a good way to fill in some of the negative space. I have used foam tape to raise some of the smaller pieces such as the pencil and blue ball behind the scooter on the left. When you are happy stick every thing down including your photos.
Finally - add some titles. I have added chipboard over the photos. I will also add journaling later and will put that under the photos to the left side.
I hope you have enjoyed my layout and would love to see some of your layouts using some or all of my ideas.
Monday, 5 July 2021
MIntay Childhood Range - Craft on the Run
Mintay Childhood Paper Range - fussy cutting and page layout.
Many of you know me as all about mixed media especially as most of my classes that I teach at Craft on the Run have lots of different mediums. However one of my other loves, is Mintay papers. It gives me a chance to relax and do some fussy cutting as well as create layouts that have depth and interest.
One of the challenges when using very busy paper is doing a layout where you can still see the lovely features of the paper as well.
I have used the following papers of the beautiful Childhood Range. I used 4 pieces of paper - 2 x 02 (tree house page), 1 x 06 (multiple 3 x 4 in elements page) and 1 x fussy cut elements page. You will need 3 - 3x4 photos (may need to trim to fit photos mats).
I have set out instructions below however you can refer to the main finished layout to check positioning when you start to put together.
Start by turning over your treehouse pages to the B side - this will be your base layout. Cut the middle out leaving a 1.5 cm border. Put the middle cut out aside to use later.
Trim the second treehouse page approximately 1 cm across the top and down on side. I used the general guide for the top so that the top of the balloon is on the edge.
Adhere the smaller treehouse page to the frame with the B side (yellow side). I have distressed all of my edges first but it is up to you. Put aside.
Cut out 3 photo mats from the photo mat page. I have chosen 3 that had a yellow edge but it doesn't matter which ones you choose. Put rest of the page aside. You wont need to use it again for this layout.
From the elements page, cut a spray of flowers with leaves and one of the banners. you can cut more and add in when you are finishing. Up to you how many extra elements you want to add.
MT-CHL-03 Treehouse/Stars Childhood
MT-CHL-09 Fussy Cut Sheet Childhood
Monday, 21 June 2021
iCraft Australia - June Reaching for the stars
Reaching for the Stars
This was a chance to be creative and I love mixed media. So with lots of new exciting products and some fun, I chose a picture of my granddaughter Amelia reaching up to touch some bubbles.
To make, paint a mixed media card with the global waters chalk paint. Using the squares stencil , add some white colour randomly to break up the background. Tearing pieces of the decoupage paper (I picked the words) and paste on. Using a embossing pen, draw parts of the circle stencil over the base. Add blue embossing powder and heat. This adds another layer of texture and colour.
To finish off, cut out the picture of the little girl from the decoupage paper, paint the wooden embellishment and layer all of the pieces including the string of pearls (I cut of some pieces to glue in behind the photo. I have also added some cotton thread embossed with copper chunky embossing powder to add another layer.
Take your time in layering, putting pieces on top, changing and moving around before gluing down. The aim is that it is random and has a grungy look.
Hints and Tips - Pearl Strings - if you want to change the colour of your Pearl strings, put a small amount of alcohol ink (colours in a similar tone or colour range work best) in a small saucer etc. using tweezers, roll the pearls through the ink until all covered. I have used a caramel colour to change the pearls to a sepia tone for the layout.
I hope that you have enjoyed my mixed media card.
Sunday, 6 December 2020
More Than Words Childhood and Gold