A wonderful rich mood board. I thought that I would take inspiration from the outdoors earthy aspect of the pictures in the mood board.
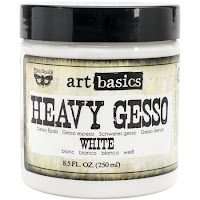
I used Ranger Giant tag and using soft matt gel stuck strips of gauze to create a textured background. I dabbed the Matte Soft Gel on the gauze to stiffen the tag. Once dry, Using a cobblestone stencil and randomly stencilled molding paste over the tag. Using rust effect paste in a variety of colours - brown, green and blue textured patina effect dabbed to add colour and highlight the stencil and gauze. As you dab, spray with water so that the pastes blend into the gauze. You want to be able to see the texture but also blended into the gauze to blur the edges.
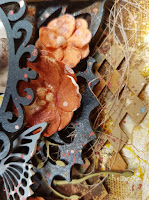
Once dry, start adding the layers of chipboard. I started with the old wooden fence (trim to size by cutting some of the end and trimming to match the top). Use rust paste and a double sided texture brush to make wavy lines representing wood grain. Once dry, use brown paint to dab and add colour and tone so that the it does not look flat. All other chip boards are painted with a range of Duty Attic paints (shown below).
To add a final rustic look, use Dusty Attic Rusting powder and sprinkle diagonally across the tag and over the butterfly to add a rustic earthy look. (to deepen the rust colour - use vinegar in a spray bottle and once dry, respray if needed - the colour will develop over 24 hours).
I used a range of Lindy Stamp Gang sprays to paint flowers that represented the colours in the mood board and the photo.
To finish off, add the frame, words and photo and splatter with the main colours that were featured in the project over the project (protecting the photo).
I hope you enjoy this earthy rich tag that features a beautiful photo of my granddaughter Amelia.


