Showing posts with label paper range. Show all posts

Sunday, 22 May 2022

iCraft Australia Woodland Cuteness


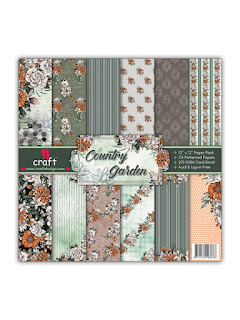
Time for some cuteness with a tag featuring the cute squirrel from the iCraft Decoupage range. I cute out the larger squirrel on the paper as well as some leaves from the flimsy paper and some flowers from the Country Garden Range. I had some left over from other projects. 

Using a brown chalk paint, randomly paint the tag. You don't want it to be covered perfectly. Stencil randomly over your tag with modelling paste and chalk paint - Stewart House Brown. To thicken it slightly and add a metallic tone, I mixed in Gold Metallic wax. Leave To dry. 

Paint your wooden embellishments. I was using left over pieces. Cut a small piece of Pearly String - I used Gold. snip each ball and put in a small amount of red alcohol ink to change the colour.  

Put together by mounting the squirrel on some foam pieces to raise it up but remember to leave room to slide the wooden embellishments under. Add the flowers and leaves. Finish off by flicking some of my favourite chalk paint over the top - Coconut Milk. Finally add your pearls. I have only added a few but you can add as many as you want. 

I hope you have enjoyed. I have put links to some of the products below however, click on the link below to the full range of products:


Tuesday, 21 September 2021

iCraft - Cuteness, Love and Flowers


The beautiful iCraft paper range called Country Garden was perfect for a layout with lots of fussy cutting. 

Prepare  your wooden embellishments with chalk paint. For the honey comb pieces paint with Minnesota Pines mixed with some white gesso. This creates a softer green to compliment the back ground colours.  Paint the words and heart arrow with the full colour of  Minnesota Pine. Add some lightness, use watered down white gesso to take down the solid colour . Paint the leafy wooden pieces, with Deep Waters. Once dry, dab watered down white gesso to add depth to the painted surface. 

Assemble your layout - mat your photo on 3 pieces of complimenting papers and use foam tape between the layers. I always align slightly off centre which adds a feature to the layout. I started with a base paper that also featured flowers and added in a range of fussy cut flowers of various sizes to sweep the blooms from the top left around the photo and bottom right up on the left hand size. Arrange your flowers on the layout adding some foam tape to raise the top ones to add depth. Once adhered, slide the wooden embellishments under the floral arrangement making sure that is is off centre. To finish off, I added some watered down Deep Waters chalk paint under some of the flowers to add depth to the background. 

I have added some close up photos of the layout and some of the products used. 

For a full range of iCraft products, please follow the link bellow:

https://tinamarie.com.au


  https://tinamarie.com.au/product/wooden-embellishment-i331/